How to make a horizontal menu bar based on pages and labels
- Login to your Blogger.
- Click Layout menu on the left panel

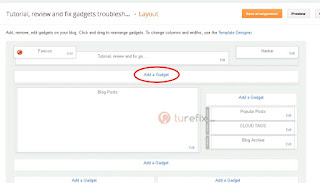
- Click Add Gadget link at the top bar

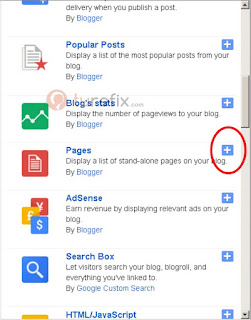
- Browse for Pages gadget and click the plus button next to the right

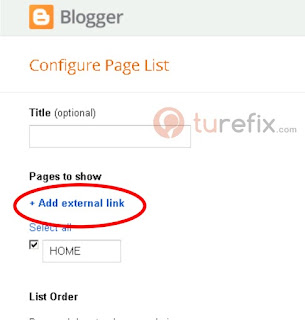
- Configure Page list editor should show up and for a menu bar based on pages, a blog must have a page, then the link and title of the pages will automatically added to this editor, they should be listed under the List Order section.

- And if you want a horizontal menu bar based on post's Labels you can click the Add external link

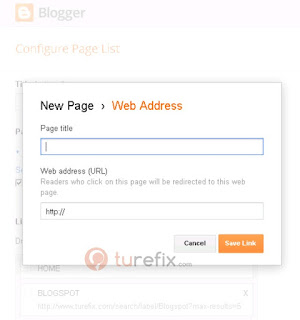
- A box will pop up asks for Page Title (this will be the title of the menu)

and for the URL, it's better to copy the URL directly from the labels to avoid broken link, for example:
This link
http://www.turefix.com/search/label/Android
Is different from this one
http://www.turefix.com/search/label/android
The different is between Android and android. W3C has spoken:
URLs in general are case-sensitive (with the exception of machine names). There may be URLs, or parts of URLs, where case doesn't matter, but identifying these may not be easy. Users should always consider that URLs are case-sensitive.
- Search for all the labels you wanted to appear on the the menu, you can search for them on your blog homepage and copy one link and paste on the menu URL. Do this for all the labels one-by-one.
- If you have finished, you can go for the CSS. For fancy appearance you have to open the HTML Template Editor, then backup the template first.
- Search for .tabs-inner .widget this should be located between <b:skin> </b:skin> and under Tabs section.
- Add new styles among the other Tab's styles (to organize the code better) and modify the a tag, you could have something like this:
.tabs-inner .widget li a:link{
   /* these are between comment tags, you can remove these later
   put css style here
   Tips:  - padding 10 px to 15 px might have a nice and big impression.
          - put comment tags around 'border-$startSide' and 'border-$endSide'
            to remove their default style which won't look good on :hover
            they are inside '.tabs-inner .widget li a{ }'
          - and make your own border
          - change the font size, background color, shadow, and so on
   */
}

.tabs-inner .widget li a:visited{
   /* put css style here */
}

.tabs-inner .widget li a:hover{
   /* put css style here */
}

.tabs-inner .widget li a:active{
   /* put css style here */
}
Put those new 4 styles in your code and if you need help to style your menu from CSS generators you can visit one of these sites
http://enjoycss.com
http://www.colorzilla.com/gradient-editor/
http://www.cssmatic.com/gradient-generator
http://css3generator.com
That's it now you have a nice horizontal menu in your blog.


