Requirements
- Download BlueStack Android emulator (13 MB)
- Internet connection for online installation (450 - 550 MB), required once even after uninstall you won't have to do this again unless the data folders manually deleted.
- Laptop/PC with Windows 8.1, 8, or 7.
- Have an Administrator login on that PC/Laptop.
- Must have 2 GB of RAM (minimum).
- Hard drive free space 9 GB (minimum), for apps, games, and data storage.
- Incompatibility with BitDefender, you must have one of them but not both on the same PC/Laptop.
- BlueStacks emulator doesn't work well if you have Microsoft Virtual PC, VMWare Workstation, or Oracle Virtualbox installed on the PC/Laptop. (I experienced glitches and error messages with Virtualbox installed and ran the same time with BlueStacks).
BlueStacks Android emulator Installation
- Turn on the internet connection and double click on the BlueStacks file.
- The main installation file have to be on the same drive location with Windows file system, commonly it would be on drive C:\
- You may choose a different drive location to put all of the apps, games, images data for your android file system on your PC/Laptop.
- Follow all the the instructions to finish the installation, keep your internet connection on for some initialization of the games/apps data.
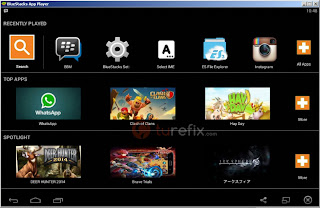
- After finished the installation you should have the interface similar to this.

Troubleshooting BlueStacks Android Emulator
front-end vm error, in some case you need to open BlueStacks program directly from the Start menu, don't make shortcut or pin to the taskbar of the program.BlueStacks might telling you to update the graphic card driver of your PC, you can download the latest driver and install it, but if you encountered front-end vm error after driver update just rollback the driver.
Windows Control Panel » System » Device Manager » on Device Manager window click the plus button on the left of Display Adapters » right click on your video card type then select Properties a dialog box will appear » click Driver tab » click Roll Back button
But if you had front-end vm error before video card driver installation, you have to update the video card driver.
Please note! we are not affiliated with BlueStacks and there are many options out there other than BlueStacks, we will review the others in the next article. If you have any question, problem during installation, or while using BlueStacks program or any useful tips you like to share you can leave the question on the comment section below.
